Sometimes we don’t want our friends or family members to touch some of our personal or important files stored on our laptops. The biggest problem happens that we can’t always hide our Windows password from our brothers, sisters, or other family members.
So, in this case, you can create a password-protected folder in your Windows computer to put all your important files inside.
Via this article, I’m going to guide you on how to create a password-protected folder on your Windows laptop without using any software.
However, there are many software available on the Internet for the same but they sometimes might be risky. If due to any reason the software gets deleted from your system, you might lose all your important files.
In this tutorial, I will tell you a very simple way to create password protected folder in Windows that doesn’t need you to install any software.
Steps – Creating the Password Protected Folder in Windows
Creating a password-protected folder in Windows can be done by plenty of methods. Following are the steps for the simplest method ever.
Step 1: Copy the following code and paste it to Notepad.
cls

@ECHO OFF

title Folder Private

if EXIST "AUI Locker" goto UNLOCK

if NOT EXIST Private goto MDLOCKER

:CONFIRM

echo Are you sure you want to lock the folder(Y/N)

set/p "cho=>"

if %cho%==Y goto LOCK

if %cho%==y goto LOCK

if %cho%==n goto END

if %cho%==N goto END

echo Invalid choice.

goto CONFIRM

:LOCK

ren Private "AUI Locker"

attrib +h +s "AUI Locker"

echo Folder locked

goto End

:UNLOCK

echo Enter password to unlock folder

set/p "pass=>"

if NOT %pass%== PASSWORD_GOES_HERE goto FAIL

attrib -h -s "AUI Locker"

ren "AUI Locker" Private

echo Folder Unlocked successfully

goto End

:FAIL

echo Invalid password

goto end

:MDLOCKER

md Private

echo Private created successfully

goto End

:End
Step 2: In the above code, replace the key PASSWORD_GOES_HERE with the password you want to use to unlock the folder. For example if you want the password to be 123456, the line should look like this:
if NOT %pass%== 123456 goto FAIL
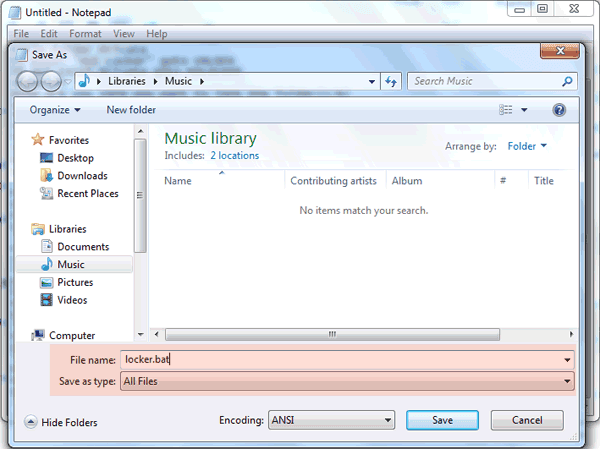
Step 3: Once you’re done with the code, save this Notepad file in .bat format such as locker.bat. Make sure to change the Save as type: to All Files (*.*).

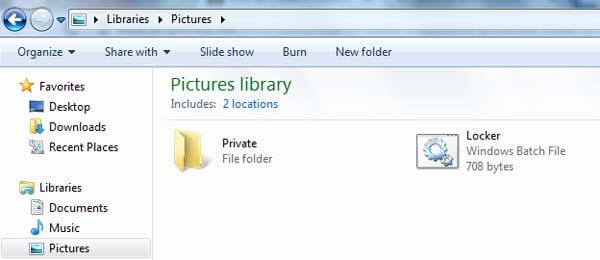
Step 4: Now, double click the locker.bat file and a folder named “Private” will be created. You can put any of the important files that you want to password-protect in this folder.

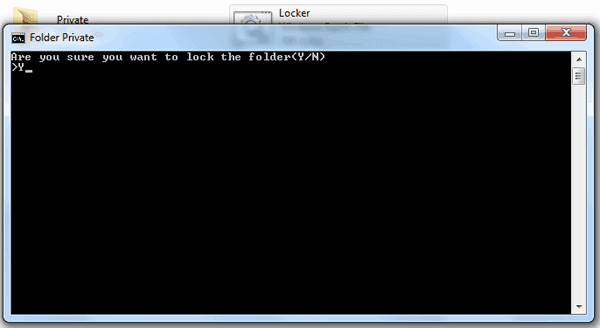
Step 5: It’s time to lock out this folder to password-protect your important files. So, again double-click on locker.bat file and it will prompt you to answer are you sure want to lock this folder? Press Y and hit Enter. The “Private” named folder will be locked/hidden.

Step 6: Now, you would be thinking about how you can get to that folder again. To do so, you need to double-click on the locker.bat file once again, and it will ask you to enter the password you chose in the code (Step 1 – Step 2). As soon as you’ll enter the password, the folder will again be visible in front of you.

That’s all about creating a password-protected folder on a Windows computer without using any external software. But, still here’s one thing to be noted this method isn’t secure enough.
Anybody can hack the password by simply opening the locker.bat file in an editor such as Notepad. So, it’s just a very unsafe way to protect your important files. If you just wanna hide folders and files from those who don’t know about this trick, you can go for it.
However, you can simply hide a folder on your Windows computer by customizing the folder properties and folder options and make a folder invisible by customizing the folder icon.
Read Also: How To Protect PDF Files With A Password For Free


![How To Connect Laptop To a Desktop Monitor [6 Methods] Connect laptop to a desktop monitor; featured image.](https://allusefulinfo.com/wp-content/uploads/2023/11/connect-laptop-to-monitor.jpg)

File was created but it is not asking any password while open the folder. and also it is not going to hide. its showing completely on my desktop. I am using windows – 7 enterprise 32 bit OS.
It’s truly very easy way to password protect files in Windows but as you already told that it’s insecure method. Anyone can edit the batch file and see password.