There might be many reasons for disabling the automatic updates such as it can eat up the large data volume of your limited data plan and sometimes it might cause some technical issues with the system too.
But generally, updates are released to make the software more modern, powerful, and secure than before. And that’s why Microsoft has made it by default compulsory for Windows 10 users to keep their computers updated.
In fact, the company has set its new operating system Windows 10 to automatically receive the new updates by default. The worst thing is that Windows 10 users are feeling problems in disabling these updates.
Windows 10 Pro users can only delay the updates they receive whereas if you’re using Windows 10 Home, you won’t see any option to even delay the updates.
But, still no need to worry as here I’m going to share some tips and tweaks by which you’ll be able to stop your Windows 10 operating system from downloading unnecessary updates.
Trick #1: Set WiFi as Metered Connection
Interestingly, if you use WiFi to access the internet in your Windows 10 computer, disabling the Windows 10 automatic updates becomes the easiest task.
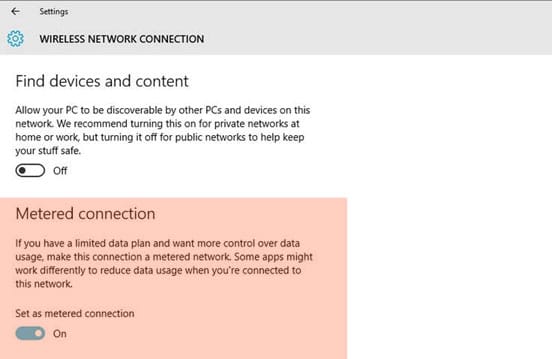
Actually, there is a simple option in the WiFi settings called Metered Connection. It stops your Windows 10 computer from downloading automatic updates when enabled.
To enable it, search for Change WiFi settings in Start Menu or Cortana. Click Advanced Options, and turn on the Set as Metered Connection toggle.
Trick #2: Disable Automatic Updates Using GP Editor
As already mentioned Microsoft has made it by default compulsory to update the Windows 10 operating system automatically, so the option to disable the automatic updates is hidden from the settings.
But, still by using GP Editor (Group Policy Editor), you can again make this option show up in the System & Security settings of your Windows 10 computer to prevent it from downloading the automatic updates.
Now, follow these steps to disable Windows 10 automatic updates using GP Editor:
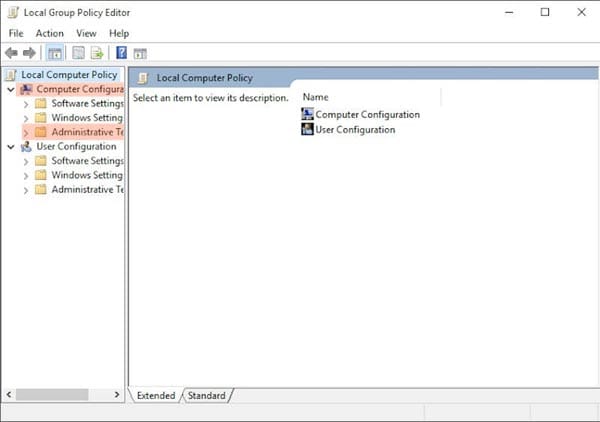
- Open Group Policy Editor by searching gpedit.msc in the search bar and press Enter. When GP Editor is open, click on Computer Configuration, and select Administrative Templates.
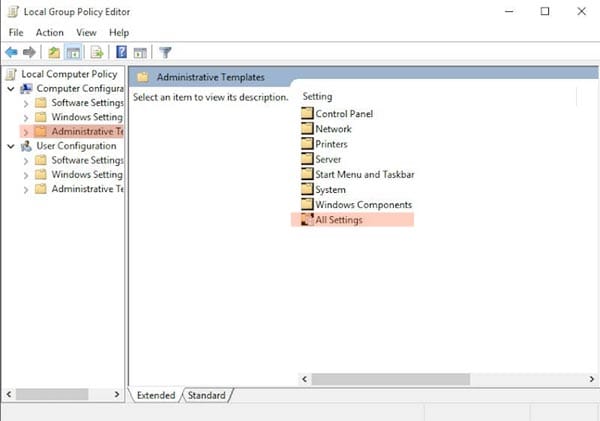
- Now, select All Settings and scroll down the list to find the option Configure Automatic Updates. Double-click on it.
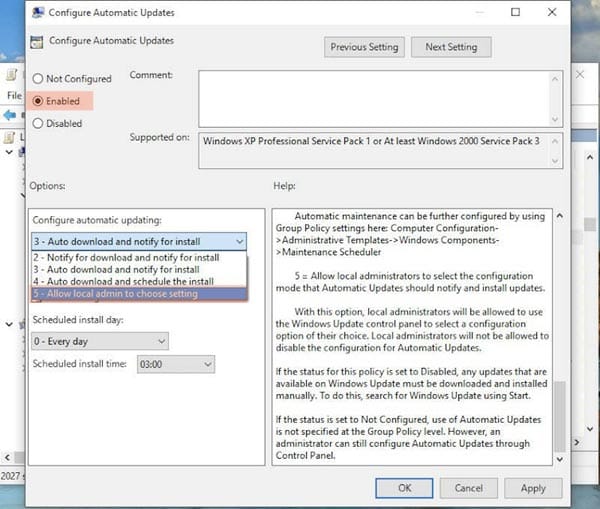
- In the next screen, select the Enabled radio button from the upper left side of the window. Once you enable the automatic updates, you should see the options pane at the bottom. Click the dropdown bar and select the fifth option that says Allow local admin to choose setting.
Now, the option to disable the automatic updates will be visible in your Windows 10 settings. You can go to settings and disable the automatic updates by following the steps below:
- Select System & Security options from the Control Panel of your Windows 10 computer.
- Now, click on Windows Update, and choose Change settings on that page. It will then show you an option that says Check for updates but let me choose whether to download and install them. Select it and your computer will never download and install updates automatically without your permission.
However, this way your Windows 10 computer will check for the new updates from the operating system but never download or install them without your permission. But, in case you even don’t want your system to check for updates, you can do so using GP Editor.
Simply, open the Group Policy Editor and navigate to Computer Configuration » Administrative Templates » All Settings » Configure Automatic Updates, as mentioned above. And finally, on the next screen select the Disabled radio button.
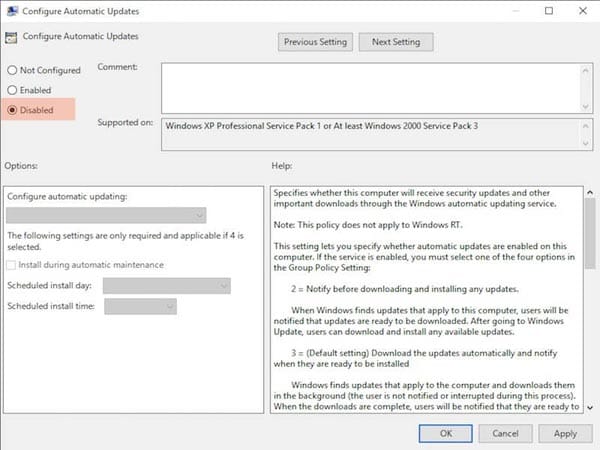
That’s it. Now your Windows 10 computer won’t even check for the new available updates. It means the updates are completely disabled in your Windows 10 PC.
Trick #3: Hide or Disable Selected Updates
However, the above method works great to disable the automatic updates in your Windows 10 computer but what if you want to disable selected or any problematic update?
Actually, there’s a tool known as “Show or Hide Updates” Troubleshooter.
It lets you hide or disable any problematic driver update in your Windows 10 computer. Once, you download and install the troubleshooter, follow the instructions to temporarily prevent (disable) any problematic update.
That’s all about disabling the automatic updates in Windows 10 computers. I’m sure with the help of any of these three tricks you’ll be able to disable Windows 10 automatic updates easily.
Let me know how did you find this post. Also, comment if you still feel any problem in disabling automatic updates on your Windows 10 computer.

![10 Best Podcast Recording and Editing Software [2024] 10 best software for podcast recording and editing](https://allusefulinfo.com/wp-content/uploads/2022/02/software-for-podcast-recording-editing.jpg)


Thanks. This post is highly appreciated as I also want to disable automatic updates in my Windows 10 PC.
It’s my pleasure, Andrew. Keep visiting. 🙂
Good Stuff, hope it works out.