
Remote Desktop Connection (RDP) is a feature of the Windows operating system that lets you control any other Windows computer remotely from your PC. It means you can easily control your office PC from your home or anywhere around the world.
This is a built-in feature in all Windows operating systems, so you don’t even need to install any third-party software to establish a remote connection in a Windows computer.
So, whether you need remote access to any of your clients’ PC or just want to access some important files from your office computer while traveling, this article is for you.
In this article, I will guide you on how to establish a remote desktop connection in Windows 10/11. With the help of this guide, you’ll be able to connect with any remote computer that has a Windows operating system.
How to Enable & Use Remote Desktop in Windows 10/11
The process is almost the same to enable remote desktop connection in Windows 10 and 11 computers. So, let’s check out the steps to use Remote Desktop in any Windows operating system:
Step 1. Make Sure Your Windows Edition Supports RDP
There are some requirements for a computer to act as a Remote Desktop server (a computer that you’re connecting to). It needs to have a Pro Edition of the Windows operating system. On the other hand, the client computer (the computer you’re connecting from) can have any edition of Windows or even a different operating system.
Step 2. Turn on the Remote Desktop on the Remote PC
First of all, open Settings and then click on System to open System Settings. Now scroll down to the Remote Desktop option and turn on the Enable Remote Desktop toggle. On the same page, note down the PC name because it will be required on the client computer to connect with this PC.
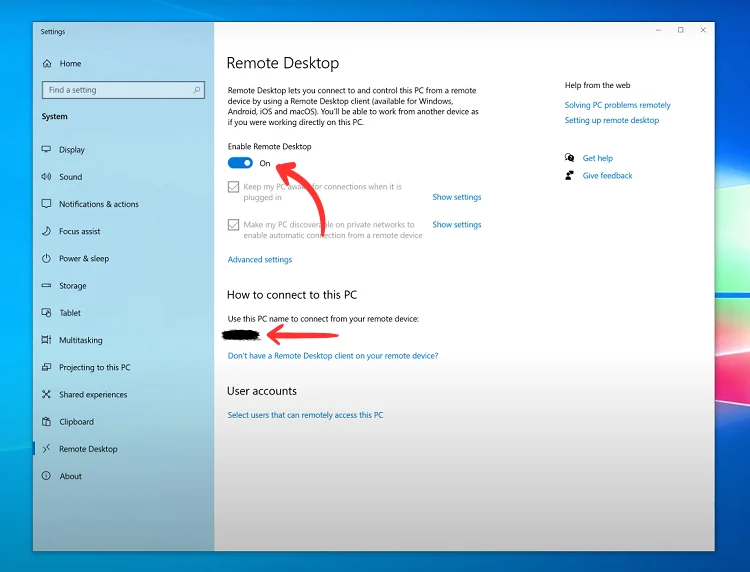
When you turn it on, Windows automatically creates a firewall rule so that anyone can gain access to your computer with the help of your PC name, username, and password.
Step 3. Connect from the Other Computer
Once you have enabled the Remove Desktop Connection on the server computer, it’s time to connect to it from another computer remotely.
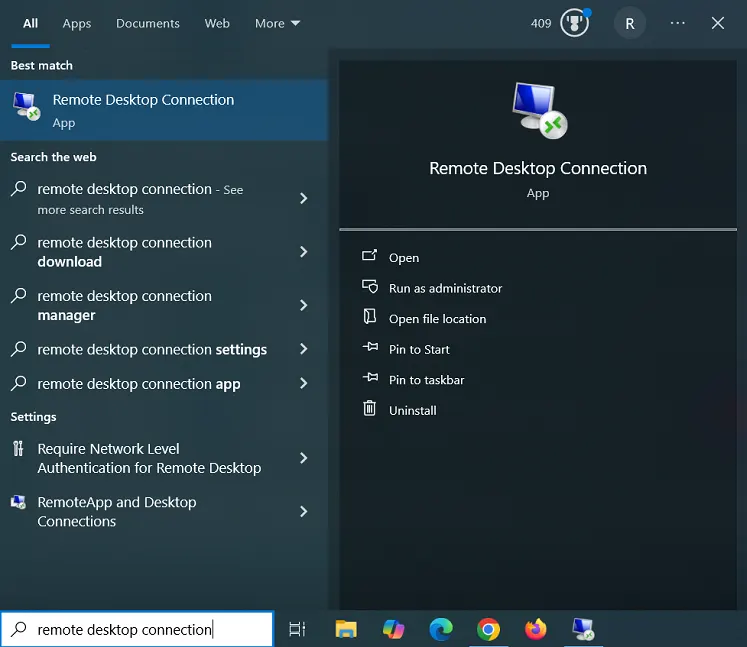
In the search box on the taskbar, type “Remote Desktop Connection” or “mstsc” and then open the Remote Desktop Connection app.
Now, in the Remote Desktop Connection app pop-up, enter the PC name that you noted down in the previous step and then click the Connect button.
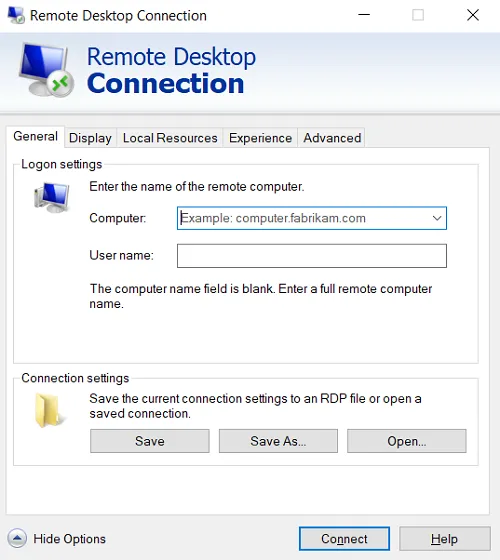
It will then ask you to enter the username and password. That’s all. As soon as you enter the details, you’ll be connected to the destination computer remotely as if you’re sitting in front of it.
Read Also: How To Connect Laptop To a Desktop Monitor
Steps for Establishing Remote Desktop Connection in Windows 7
Now, have a look at the complete steps with screenshots to learn how a remote desktop connection can be established in a Windows 7 computer:
- First of all, make sure that Windows Remote Desktop Connection is allowed through the firewall or not.
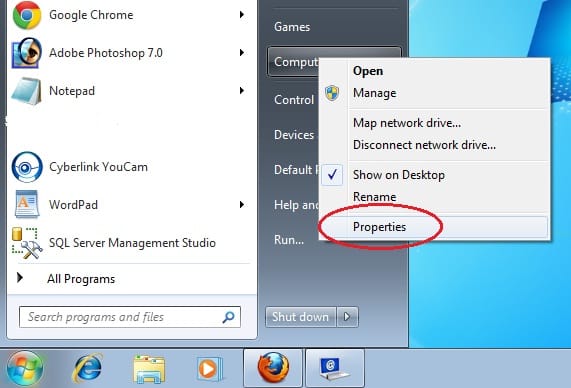
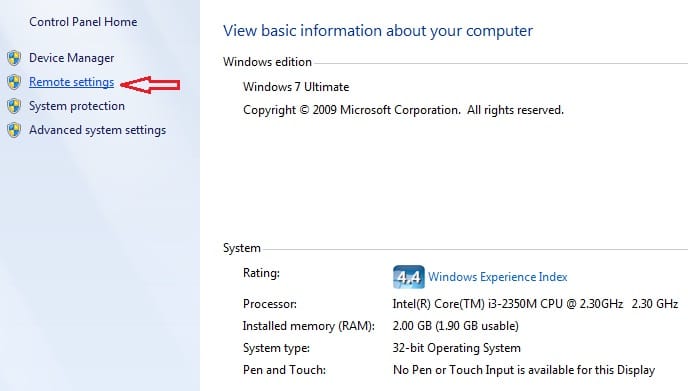
- Now, open the Start Menu and right-click on Computer, and select Properties.
- Click on Remote Settings on the left side of the page.
- Now, in the next system properties screen, tick the term Allow Remote Assistance connections to this computer and then Tick Allow connections from computers running any version of Remote Desktop (less secure) and click OK.

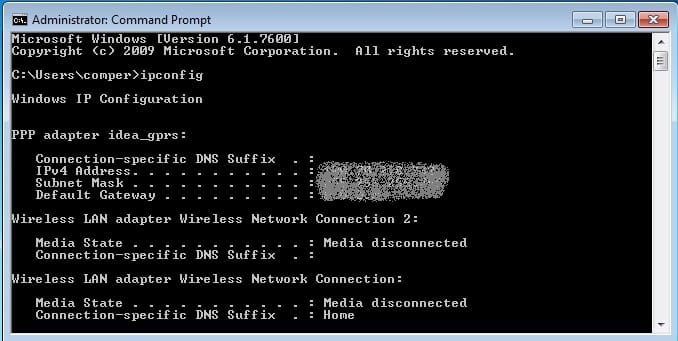
- You have to discover the IPV4 address of the target computer (which you want to access through the client computer). You can do it using the command prompt. Go to Start, type Command Prompt, and hit Enter.

- Now, type ipconfig in the command prompt and hit Enter. You will see the IPV4 Address in the list of Windows IP configurations. This is the address of your computer.
- Now, the time is to establish a connection between the client computer and the target computer. So, go to the client’s computer, open the Start Menu, and Type Remote Desktop Connection or mstsc to directly open Remote Desktop Connection.

- In the next pop-up box, i.e., Remote Desktop Connection box, type the IPV4 address of the target computer that you have found in the previous step.

- As you click on Connect, Windows will ask you to enter your Username and Password. Without entering a username and password, you can not get access to the target computer.
That’s it! This is how you can easily establish a Remote Desktop Connection in Windows 7, and I hope you’ll be able to remotely access your target computer using Remote Desktop Connection.


