Google-owned blogger.com is one of the most popular content management systems to create free blogs. The blogs hosted on Blogger are accessed through a subdomain of blogspot.com. But, if you want to host your own custom domain to Blogger, it’s also possible. In fact, it’s very easy to add a custom domain to your Blogger blog and enjoy free hosting.
Actually, I found many people asking the question, “how to add custom domain to Blogger from GoDaddy” and this gave me a reason to write a detailed guide on the same topic. I then purchased a domain from GoDaddy and successfully hosted it on Blogger. In this article, I will share the overall experience of hosting a custom domain to Blogger from GoDaddy in the form of a simple step-by-step guide.
Here’s How to Add Custom Domain to Blogger From GoDaddy
There are many benefits of hosting your own custom domain for Blogger such as lifetime free web hosting, no subdomain, etc. Many beginners feel difficulty in adding a custom domain to Blogger. Especially, if you bought the domain from GoDaddy and going to host it with Blogger, check out the steps below.
Step 1. Sign in to Blogger & Create a Blog
First of all, you will need to sign in to Blogger using your Google account and create your new blog. In case, you already have a Blogspot blog, you can leave this step. But, if you’re using Blogger for the first time, just sign in with your Google account and create your first blog with Blogger.
It will ask you to enter the title of your blog first, and then you’ll have to choose a URL for your blog (the subdomain of .blogspot will automatically be added to the URL) finally it will ask you to confirm your display name. Once, you’re finished with the blog creation process, move on to the next step.

Step 2. Set up your Custom Domain in Blogger
While writing this step, I assume that you already have purchased a domain from GoDaddy. So, once you successfully created your very new blog with Blogger, it’s time to set up your custom domain in Blogger.
Log in to your Blogger account and go to Settings. Scroll down the page to Publishing and click Custom domain. In the popup, enter your domain with www such as www.yourdomain.com. As soon as you’ll click on Save, it will show you an error asking you to enter two CNAMEs in your domain registrar.

Step 3. Add CNAME Records in GoDaddy
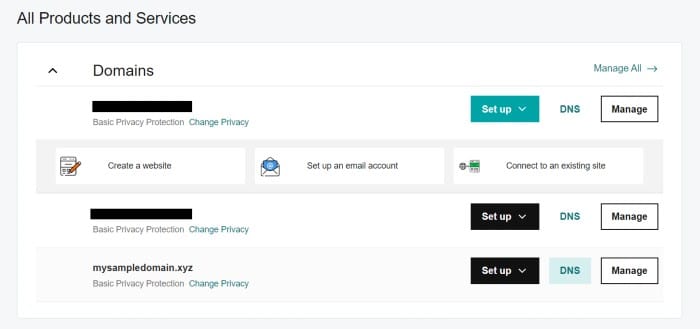
Now, it’s time to add these CNAME records to your domain registrar’s DNS settings. As you purchased your domain from GoDaddy, open GoDaddy in a new browser tab and log in to your account. Now, under My Products, click DNS just in front of your domain name to open the DNS settings.

On your domain’s DNS Management page, you’ll see some A records, CNAME records, etc. But, you are required to add new CNAME records. So, to add new CNAME records, click Add.

Now, choose CNAME as your Type from the dropdown, fill www for the Host field, and enter the value provided in Blogger in the error message for Destination in the Points to field. For the TTL field, you can leave it as default. Once done, click the Save button to save the changes.

Note: If you already have a CNAME record with www Host Name in your DNS records, you’ll have to delete that first to add the new one. Or you can edit the existing CNAME with new values.
For the second CNAME provided by Blogger in the error message, follow the same procedure. Add a new CNAME record, enter the Host Name value and Destination value in the Points to field as provided in the error message, and save changes.
Step 4. Make Sure You Don’t Have “A Record” with “Parked” Value
When I was setting up the CNAMEs in GoDaddy for my domain, I found an “A” record with a “Parked” value. It means, your domain will always show “Parked by GoDaddy” until you remove this record or value from your DNS settings.
So, just after setting up CNAME records, make sure you don’t have an A record parked in your DNS settings. If you find any, you can simply delete that specific record. To delete a record, click the Edit icon in the right and then click the Delete icon. It’s that simple.

Step 5. Repeat the Second Step; Add a Custom Domain Again
Once you have added the CNAMEs, wait for at least 1 hour to activate your DNS settings. After that, you’ll have to add the custom domain again to the Blogger account. Exactly how you performed in the second step, just go to your Blogger Settings. Under Publishing, click Custom domain and enter the domain again, and then click Save.
Step 6. Setup a Redirect to www Version of Your Domain
This is however an optional step because even without performing this step you can view your blog at your custom domain, but only when you enter the www version of the domain. When you enter a non-www version of your domain, it will not open. To fix this, you’ll have to set up a redirect from the non-www to the www version of your domain.
It’s also very easy to set up a non-www to www redirect for your Blogger’s custom domain. You just need to add 4 A records in your domain’s DNS settings that point to the following IPs:
- 216.239.32.21
- 216.239.34.21
- 216.239.36.21
- 216.239.38.21
In GoDaddy, just add 4 new A records one by one in your domain’s DNS settings, enter these IP addresses in the Points to field, and @ as your Host Name for each A record.

Once you’ve added all these 4 A records that point to the above-mentioned IP addresses, sign in to your Blogger account, go to Settings and turn on the Redirect domain option under Publishing. If it’s not redirecting immediately, you should wait for around 1 hour and then check back later.

That’s all. As soon as you save your custom domain in Blogger after setting up CNAMEs in your GoDaddy dashboard, it will start opening your blog on that custom domain. Well, after setting up your custom domain with Blogger, you should also enable the HTTPS redirection from Settings.
If you find this tutorial useful, do share it on social media with your friends. In case you are stuck somewhere or have any questions related to adding a custom domain to Blogger from GoDaddy, feel free to ask in the comments.


Very clearly you explained all the essential steps. thank you so much! I am trying to connect my blog to a custom domain since yesterday. Let’s hope it will be done after adding all 4 A records.
Thank you for the great guide. I’ll try it. Thanks again.
My root domain is hosted on another Hosting But I want to host my subdomain to blogger. How can I achieve this? Can you please help me?
The domain is purchased from Godaddy.
Hello Shank,
Whether you want to host your subdomain or root domain, it’s the same procedure as I guided above in this blog post. The only thing that you need to be careful about is the CNAME field with “ghs.google.com” value.
If you want to host your subdomain (such as blog.example.com) with blogger regardless of where your root domain is hosted, just enter “blog” for “Name” in the CNAME field with “ghs.google.com” as Value in your GoDaddy DNS management panel for your domain.
Actually, when you will add your subdomain instead of the root domain in Blogger’s custom domain setting, it will instruct you for CNAME values for the subdomain.
I hope it will help. Thank you for reading the article.
This is a very clear and simple guide. I appreciate your hard work and thank you for sharing this guide. It worked absolutely correctly.
This is exactly what I needed. I bought a domain from GoDaddy that I wanted to host on Blogger.
Thanks for helping me use my own domain to Blogger.
I’m glad that this guide helped you. Happy blogging 🙂
Fantastic guide. Everything is perfectly written and guided step by step. I successfully added my domain to Blogger from GoDaddy without any errors. Thanks to you 🙂
That’s great to know about your experience. I’m happy that I could help.