If you give lots of importance to your computer screen and desktop background, then you can create your own theme in Windows 7 PC by changing the desktop background, window border color, sounds, and screen saver that suits your style.
So, creating a unique theme for your Windows 7 desktop is very easy. Just read this article carefully to learn how to create your own Windows 7 theme!
Let’s See, How To Create Your Own Theme
Now, I’m going to provide the steps to create your own unique theme for your Windows 7 desktop. So, read carefully the following steps and a unique theme for Windows 7 PC will be created in a few seconds!
STEP 1: Firstly right click on your desktop and select Personalization.

STEP 2: Now, click a theme to apply it to your desktop, and change one or more of the following to make that theme unique which can not be found anywhere:
Desktop Background
The first thing that can make great changes to your Windows theme is your desktop background. So, use your own unique pictures as the desktop background to make your theme a unique one.
To change the background, click Desktop Background, browse to the pictures you want to use, select the check boxes for the pictures that you want to include in your slide show, and then click Save Changes.

Border Color
To change the color of your window borders, taskbar, and Start menu, click Window Color, pick the color that you want to use, adjust the color intensity, and then click Save Changes.

The Screensaver and Sounds
To provide an amazing uniqueness to your Windows theme, you can also change the screensaver and different attractive sounds. You can simply change the sounds you hear by clicking on Sound selecting a Sound Scheme and then clicking OK to make changes.
Similarly, you can add or change a screen saver by clicking Screen Saver, clicking an item in the Screen saver list, changing any settings to suit your preference, and then clicking OK.
That’s all, your new theme will appear under My Themes as an unsaved theme. If you want to save your own created theme, then read and continue the article.
Save your Own Windows 7 Theme
To save the theme in Windows 7, right-click on your desktop and visit Personalization in the control panel. Here under the My Themes section right click on your theme and click on Save Theme.

Now, give a name to your theme and click on Save Changes.

Delete the Theme
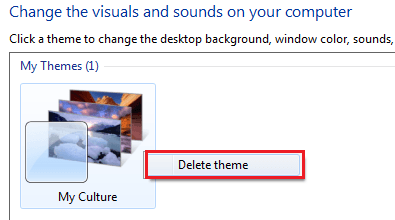
For any reason, if you wanna delete an existing Windows 7 theme, then the first thing you have to do is apply another theme to your desktop because a currently running theme can not be deleted. After that, right-click on any theme you want to delete and click on delete theme.

One thing that should be noticed here is that the theme that comes with Windows can’t be deleted anyhow. So, the only themes you have created or downloaded can be deleted.
So, using this article you’ll be able to create your own unique Windows 7 theme to impress your friends and colleagues. If you’re having any problem applying the steps mentioned in this article, you can freely speak your mind in our commenting system.


