Many times it happened with me that the updated version of a plugin didn’t prove that good as compared to its previous version. So, in that condition I always wanted to downgrade that WordPress plugin to its older version. And I did it with many plugins till now.
Today, I wanna tell you that how to downgrade a WordPress plugin to any of its previous versions.
If any WordPress plugin is crashed after updating or not supporting with your WordPress version, you may be needed to downgrade it to its previous version. I hope this article will help you to do so.
Learn, How to Downgrade a WordPress Plugin
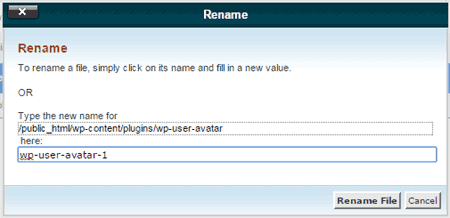
Downgrading a WordPress plugin is very easy task and can be done in less than 2 minutes. So, to downgrade a plugin first of all, rename that updated plugin (e.g. add any numeric number after plugin name to remember it for later) and you can do it from cPanel.

After renaming the plugin, it will automatically be deactivated from your WordPress blog or site. Now you will be needed to visit that plugin page in the WordPress plugins repository and navigate to Developers tab.
Here you will see all the older versions of that plugin including the current version. So, click on any of the older version of that plugin to download it on your computer.

Now, login to your WordPress admin and go to Plugins > Add New > Upload Plugin and upload this downloaded plugin (older version) and activate it. If it is now working fine, then delete the renamed plugin completely.
So, isn’t it very easy to downgrade a WordPress plugin? Still, if you’re having any trouble to downgrade any WordPress plugin to older version, let me know via comments, I will definitely help you.


Solved my problem! You’re awesome bro. Thanks for this very useful post.
Wow! It’s that easy.
Great! It’s very easy. I was thinking that it would be very difficult.
Thanks for sharing the useful information.