When you delete a file from a Windows hard disk normally, the system only says the file will be moved to the Recycle Bin. Recycle Bin gives us one more chance to restore the mistakenly deleted files without using a data recovery tool.
However, when you delete a file by pressing the Shift + Delete key, Windows will delete the file directly without moving it to the Recycle Bin. When you empty the Recycle Bin or delete files from the Recycle Bin, you will lose the only chance to restore the mistakenly deleted files to the original partition.
It’s been my habit for a long time that I always delete files by pressing Shift+Delete which tends to permanently remove files without hitting the recycle bin so that they can’t be restored from there.
A few days ago I permanently (Shift+Delete) deleted a very important file of mine from the hard drive of my Windows laptop by mistake and repented on my this habit.
But while searching a solution to recover the permanently deleted files from my Windows computer, I found a data recovery software called “iCare Data Recovery” and you won’t believe I restored my file using this software.
How to Recover Permanently Delete Files from Windows
By using this free iCare Data Recovery software you can quickly recover permanently deleted files from your Windows computer.
First of all, all you need to download this software on your computer. To download it just visit its official website and click on the Free Download button. Once it’s downloaded to the PC, run the setup and install it carefully.
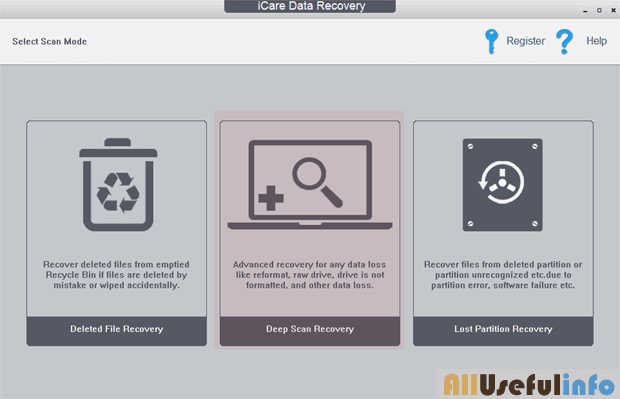
Once it’s downloaded and installed in your Windows computer, open it and choose the Deep Scan Recover mode as it’s highly recommended to quickly recover deleted files.
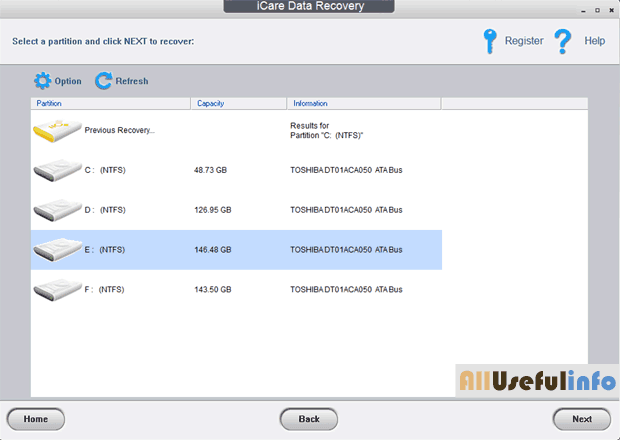
Now, it will ask you to choose the partition where the files are deleted, and then click on the Next button. As soon as you click on Next button, iCare Data Recovery software will start scanning your lost files.
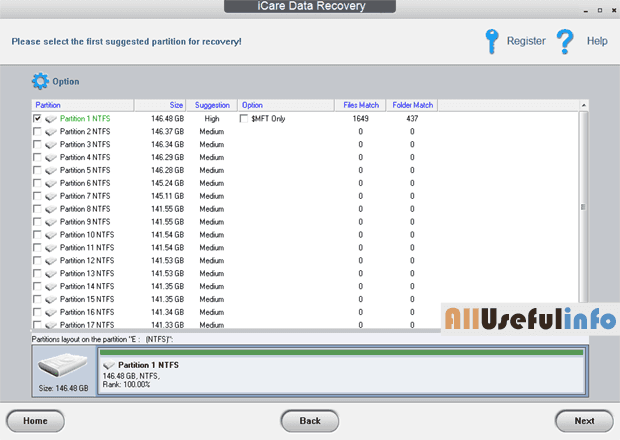
Once the scanning is completed, check the high-priority partition and click on the Next button as shown in the following screenshot.
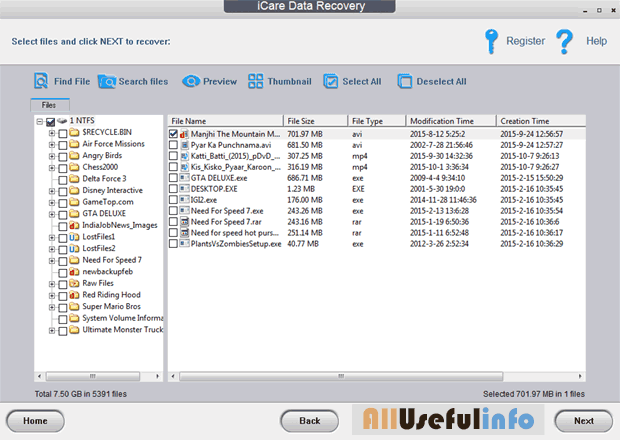
Finally, as soon as you’ll click on the Next button, all your permanently deleted files will be visible in front of you with a ‘d’ red mark. Just select the file you deleted and click on the Next button to restore it.
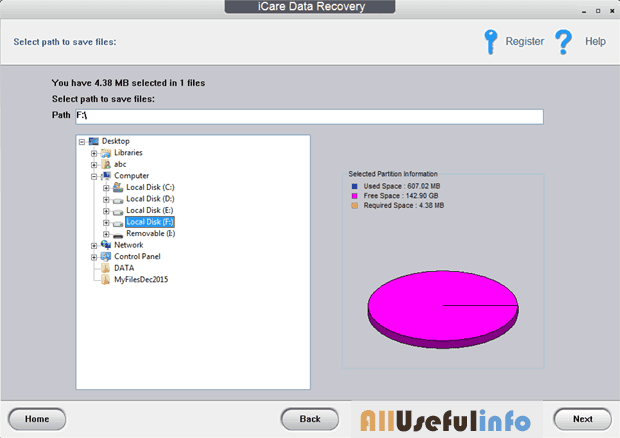
Now it will ask you to choose the path where you want to restore the file. It’s recommended that don’t save the files to the partition where they were deleted.
After choosing a path to restore the file, lastly, click on the Next button and it’s all. You’ve successfully recovered the permanently deleted files from your Windows computer.
A Few More Things You Need to Know!
We all know that it’s easily possible to recover a deleted file from a recycle bin in Windows. Even if you deleted a file permanently from your hard drive, it’s still possible to recover it which is now proved with this article.
The truth behind it is that when you permanently delete a file from your computer, it actually never gets deleted but Windows just marks that space (occupied by that file) as available for new data storage.
Thus you need to stop writing new data to the partition where files were deleted to protect the deleted files from being overwritten.
So, it’s now proved that all types of files are recoverable whether they are deleted permanently from hard drive partition or Recycle Bin.
In case of normally deleted files, they can be recovered from the recycle bin and if you delete them permanently, by using a data recovery software like iCare Data Recovery files can be recovered.
Still for any reason if you’re having a problem in recovering your permanently deleted files from your Windows 7, 8, or 10 computer, let me know via comments. I will try to help you with my heart. 🙂


This is a great tool no doubt. Thanks for the whole guide for recovering deleted files from Windows.
Hai Raman, I Lalit. I have gone through ur above artical. Dear I have by mistake deleted slui.exe file but I don’t know it’s extension. There is 16840 files and folder. Now I don’t know which file to recover. Kindly help to restore all files of slui.exe.
Just follow the above procedure and restore all the files which shows ‘d’ mark. It’s as simple as it seems. Just try once.
Hi Raman. Thanks. Will try and let u know.
Hi Sharmaji !! Thank YOU for a good article presented in a CLEAR way. Await for some more such utility based articles.
Glad you liked it. Keep visiting for more stuffs like this.
Thanks for this great tutorial Raman. You’re really making the technology easier for beginners. Good work.
It’s my pleasure Ayushman. Thanks for your kind words.