Smartphones and tablets have become indispensable accessories for people worldwide. But, nothing can beat the comfort and excitement of viewing things on a bigger display, like a computer. If you are an Android user, then you can easily access and run the Android apps on a Windows Computer.
Thanks to technology, we now have software that let you run Android apps on Windows PC, effortlessly. There are several emulators available, like Bluestacks that make it possible to run Android apps on a Windows PC. There are also Microsoft’s inbuilt features that can help you achieve the same.
Here, I will be discussing the best possible ways to enjoy your phone’s Android apps on your Windows PC.
1. Phone Link App
Microsoft has come up with the Phone Link App, which is Android-friendly and thus lets you interact with your Android smartphone through your Windows PC. It is also the best option in case you left your phone at home but can still access all messages and notifications on your computer.
System Requirements
- A Windows Computer with at least Windows 10 version running
- An Android smartphone or tablet running software version 11.0 or higher
- The PC must have a minimum of 8GB RAM
- The Android device and the computer must be on the same WiFi network
Follow the below steps to run Android apps on a Windows computer:
Step 1. Download the Microsoft’s Phone Link App from the Microsoft Store, on your computer. Once you have downloaded it, open it and click on Get Started to go ahead.
Sign in to your Microsoft account. If you don’t have one, then create one right away. After signing in, you get the following screen on your Windows.
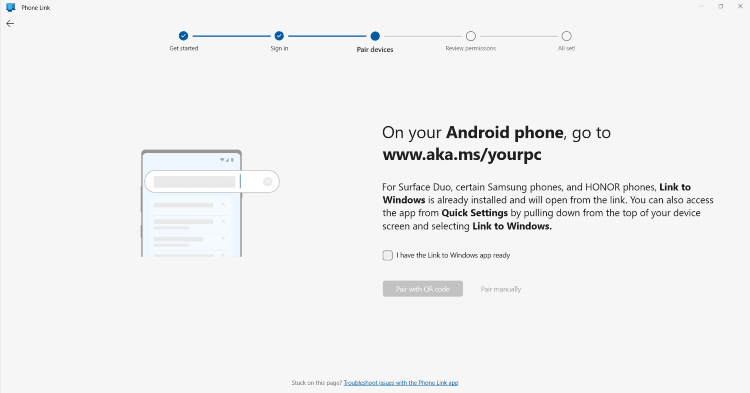
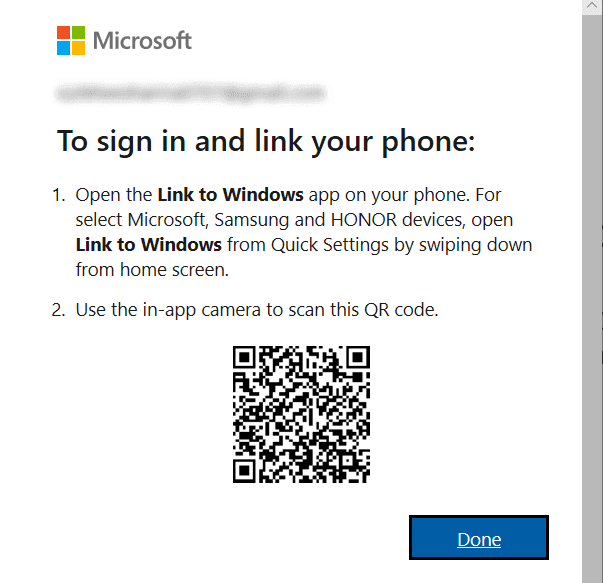
Step 2. Now, on your Android device, download the Your Phone Companion App by going to the mentioned address. Tick the option if your app is ready on the phone and then pair it with the QR code.
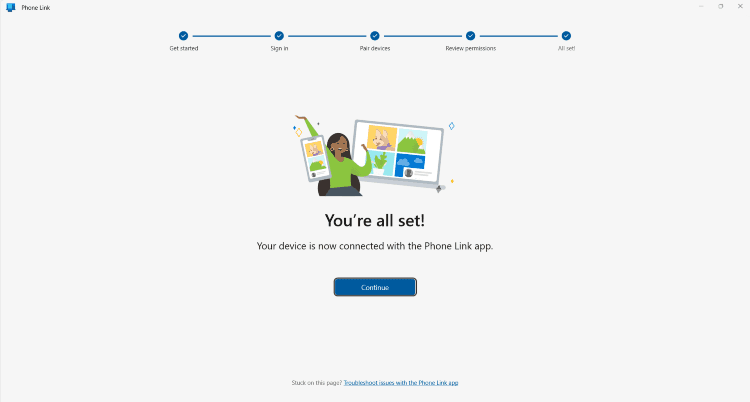
Step 3. Allow all permissions on your Android device required to go ahead. Click on Continue and this will link your Android phone with the Windows Computer.
Step 4. The computer shows a welcome screen now and the Android phone will ask for additional permission to give access. This will come up every time you connect your devices.
Step 5. On the following screen on your PC, click on Use a Mobile App on my PC.
Step 6. Finally, it will broadcast all the Android apps on your Windows computer, as shown below. There is a panel on the left hand, which will have the options; Notifications, Messages, Photos, Calls, and Apps. Click on ‘Apps’.
Step 7. All the apps installed on your phone are now visible on the computer. Click on the app you want to open. It will open up on the big computer screen just like it opens on your small phone screen.
You can even link multiple Android devices on the PC and handle them efficiently.
2. AirDroid Personal
AirDroid Personal is one of the best and most efficient tools to run your favorite Android apps on a Windows PC. It is basically an app that mirrors your Android phone on Windows PC. Thereafter all your Android apps can be managed with just a mouse and keyboard.
It will smoothly run every app on the Windows PC that is present on your Android smartphone. You can transfer files across platforms, manage calls and message notifications from the PC, use the Android camera, and play games.
Follow these steps to get AirDroid Personal on your Windows:
Step 1. On your Android device, download the AirDroid Personal App.
Step 2. Now, Sign up to create an account on AirDroid Personal. If you already have one, click on Sign in.
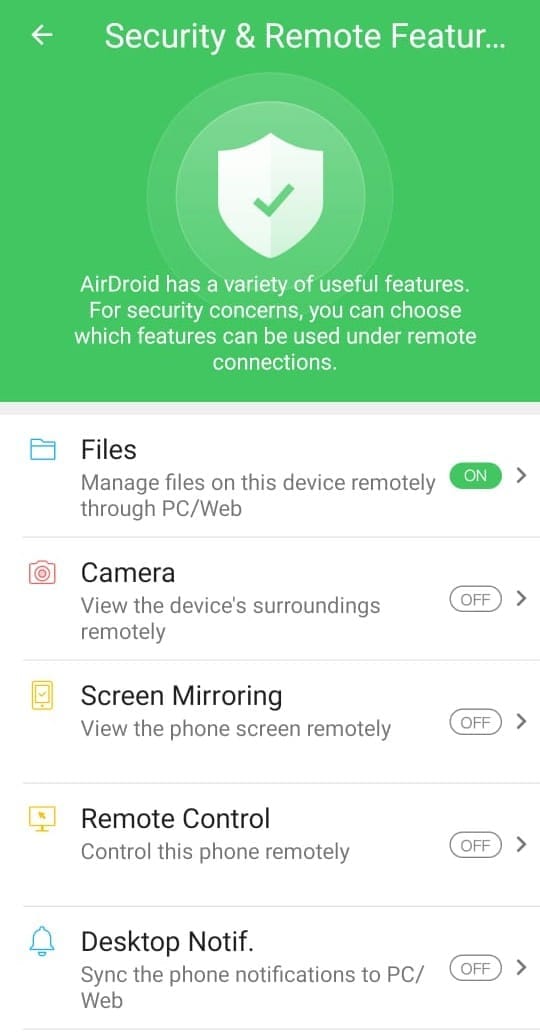
Step 3. After signing in, click on Continue to give permission to AirDroid. This step appears only for the first time when you use this program.
Step 4. Click on Remote Control to control the Android phone remotely.
Step 5. The next step is to download the AirDroid Personal Client for your Windows PC and log in with the same account details (that you created from the Android device).
Step 6. Run the .exe file to install and sign up.
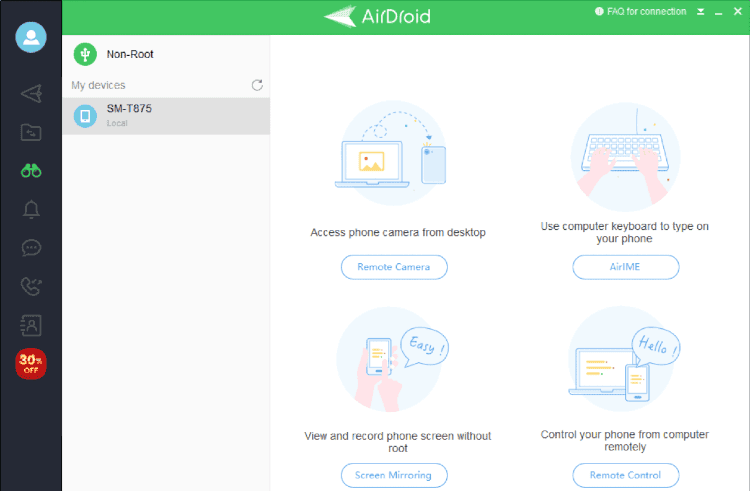
Step 7. After creating an account, on the leftmost pane go to the Telescope icon. This will show all the Android mobile devices synced with the same login account.
Step 8. Go to the Android device you want to select and click on it. Then hit the Remote Control option to make a connection and run the Android device on your Windows PC.
Step 9. When the connection is established, you can run all the Android apps remotely through your Windows PC.
3. BlueStacks 5
Bluestacks is one of the best Android emulators in the market, that lets you run your Android apps and games on a Windows desktop. It is user-friendly and offers great performance. It is ideal for running games on Windows PC that does not come with a desktop version. Get the best gaming experience with your Android games on the bigger screen of your PC.
System Requirements
- A Windows computer with version 10 or above.
- Minimum 4GB RAM.
- 5GB of free disk space.
- Virtualization must be enabled on your system. To check, press the Ctrl+Shift+Esc keys to go to Task Manager. Click on the Performance Tab and see the CPU settings. If Virtualization shows ‘Enabled’ then you are good to go.
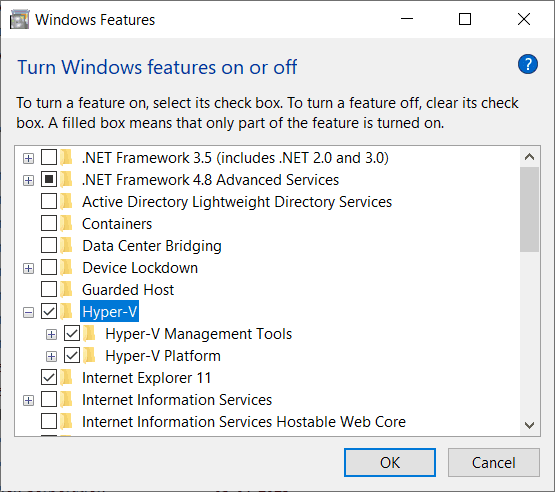
- Now, check if Hyper-V settings are enabled. Right-click on the Windows icon, and go to ‘Apps and Features’. Then on the right-hand side, click on ‘Programs and Features’. On the left, click on ‘Turn Windows Features Off or On’. A small window appears, clicking on ‘Hyper-V’ will enable it if it’s not already enabled, as shown below.
Once your system is ready, follow these steps to download Bluestacks on your Windows:
Step 1. On your PC, download the Bluestacks 5 installer from their official website.
Step 2. Click on Download and open the downloaded .exe file. Click on Run to run the setup.
Step 3. Launch Bluestacks 5 and select the folder where you wish to store its files and app data.
Step 4. Click on Install Now to install Bluestacks 5 on your Windows.
Step 5. Once the installation is complete, enter your Google/Samsung login credentials so that you can log in to Google Play or Galaxy Store to download apps from the library.
Download the apps you want and they will show up on the Bluestacks home screen and on your desktop.
Conclusion
The above three methods are the best ways which will help you run your Android apps or games on Windows. AirDroid Personal and Phone Link App so far seem to be the best methods to manage and run Android apps on Windows PC because they are very easy to install and save a lot of time and effort.
Whereas, installing emulators like Bluestacks takes time and puts a strain on the CPU’s efficiency. Nonetheless, whichever option suits you, choose to enjoy the perfect Android app experience on a bigger PC screen.
